Correcting a Projector MisalignmentUpdated 5 months ago
On occasion, a stray volleyball or basketball may knock your basketball system out of alignment. Being prepared whenever this happens is therefore important for making sure your light shows can go through uninterrupted. Below are a set of instructions that, when followed, will help you realign your system- the only requirement is that you have a lift.
Step 1: Create a “Snapshot Show”
Your snapshot is a representation of what the projector sees at the moment of installation. In this sense, the snapshot is a picture in time. When your system is knocked out of alignment, there is no changes made to the technical specs of the system, instead the only change is a uniform physical displacement. We can use this to our advantage by projecting an image of the snapshot on the floor, which we can then align to match the pattern of the floor itself.
A) Identify the projector that is out of alignment
There are a few ways to do this, but the easiest one (if you do not have their positions memorized), is to activate the spotlight within the portal one by one until you’ve found the one that is out of alignment.
B) Find the resolution of your projector
This is an optional step but it will make your life a little easier down the line. Go to your projector settings, and look for the resolution setting:
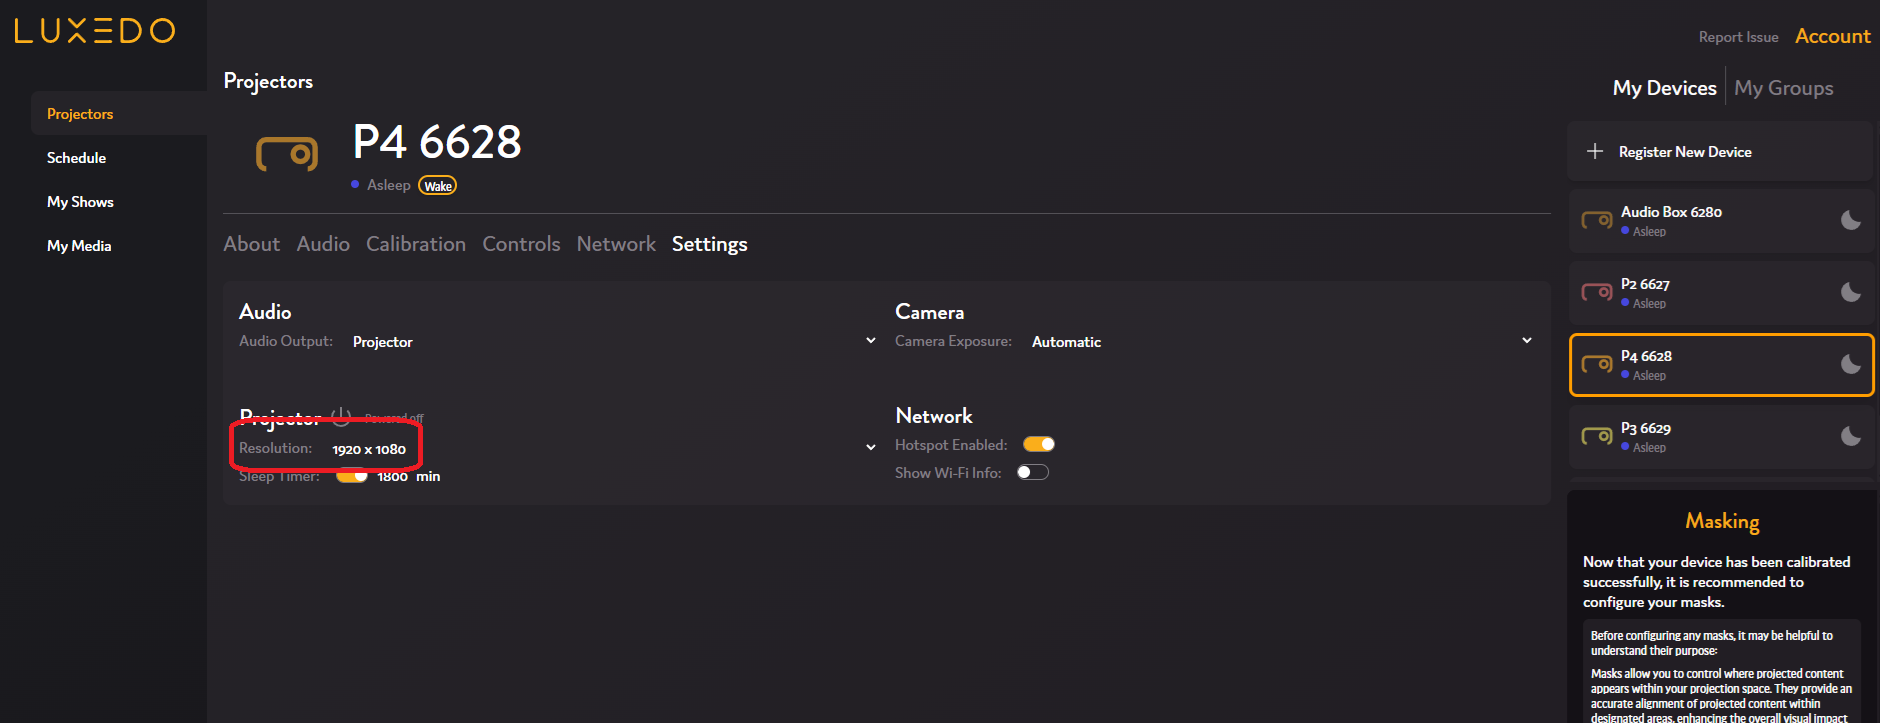
By default, most projectors will be 1920x1080, but there are exceptions depending on the specific setup.
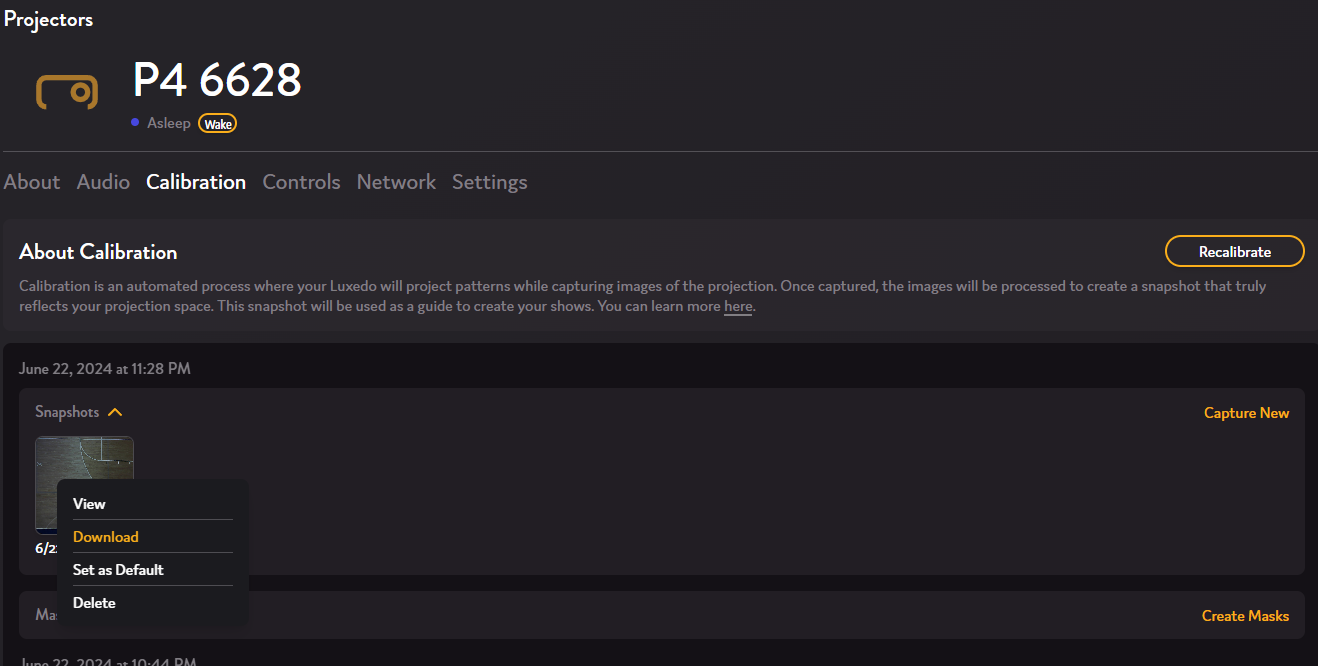
C) Download the snapshot
Now, go to your calibration view and download your most recent, accurate, snapshot:
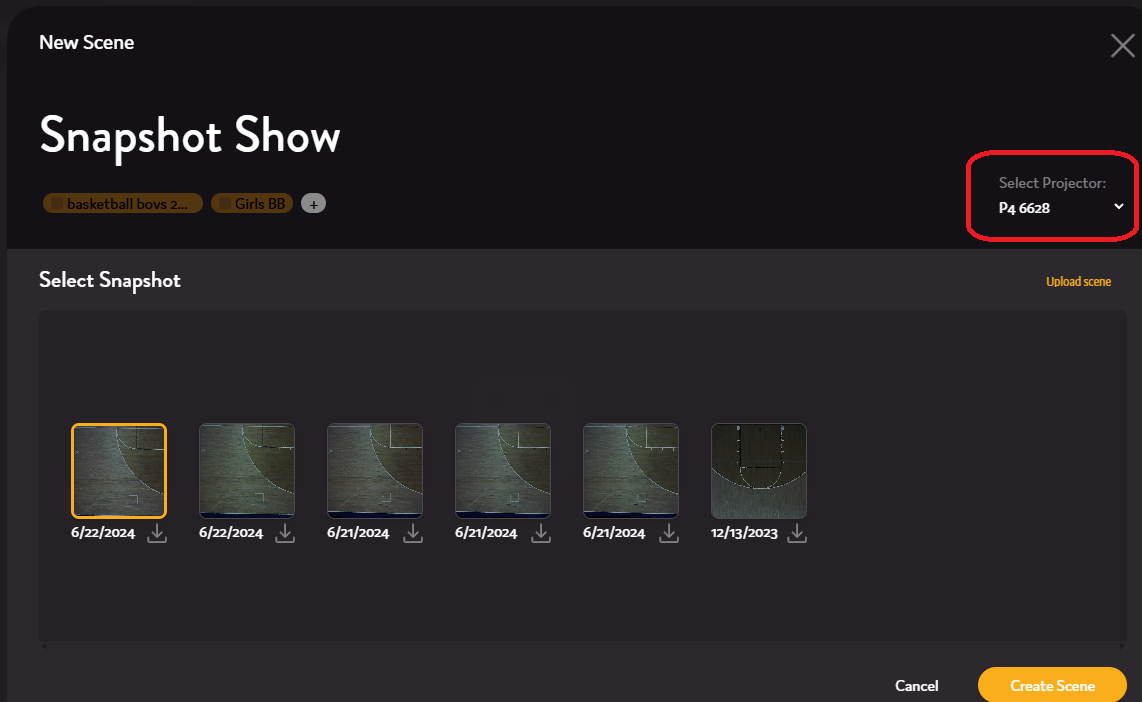
D) Create and Render a scene with your snapshot.
Go to your “My Shows” view, and create a new scene. Label it “Snapshot Show” and make sure you’ve chosen the specific projector that is out of alignment:
Go to your media tab, and click “Upload Media”. Here, you’ll want to upload your downloaded snapshot and then add it to scene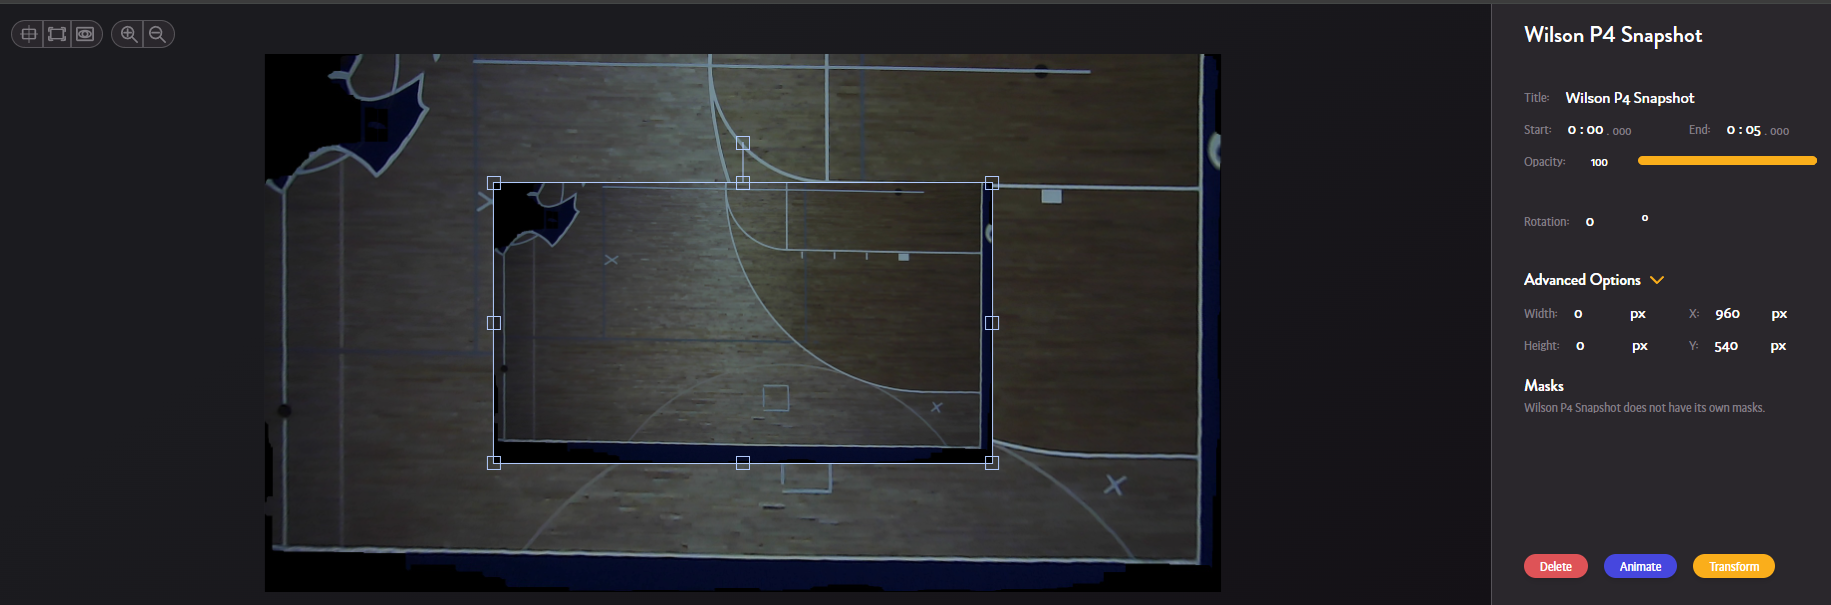
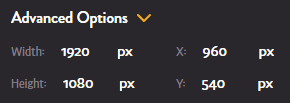
Now, under the “Advanced Options” on the right hand side, input the width and height of the projector resolution you identified earlier. In this case, it’ll be 1920 and 1080 respectively.
You should see the snapshot now filling out the entire breadth of the floor projector’s range. Now, before rendering, make sure to extend the scene. Keep in mind that this will be playing while you are up in the lift so you want it to last long enough that you won’t need to restart every 5 seconds. In this case, I choose to make the show 5 minutes long, and then I save and render.

Your snapshot is now rendered and ready to go, you will need this later for when you’re up in the lift.
Step 2: Prepare to go up in the lift
With your snapshot ready to go, find a time where you will be able to take about 15-20 minutes out of your day in order to readjust the projectors. It will also need to be dark enough that you will be able to see the image projected onto the court, so factor that into your scheduling plans. Make sure that you have the lift readily accessible at this time. Outside of the lift, the only other tools you will need are an allen wrench [Need measurements for allen wrench] and a level. It’s also worth noting that in most courts the projectors are projecting across the court to the opposite side of wherever they are installed, so it is a good idea to activate the spotlight and be extra sure that you’re going up to the right projector in the lift. Finally, you’ll want to have luxedo.app loaded on your phone so you can press “Play Now” from the lift.
If you have already contacted support, please alert them as to when you will be attempting the realignment, so an agent can be made available in the case that you need live assistance.
Step 3: Go up in the lift to the problematic projector
Every lift is different, so we cannot provide consistent instructions here that would be a proper one size fits all. What is recommended, however, is that you position yourself behind the enclosure, with the lens projecting away from the lift . It is also recommended that you try to raise the lift to the point that you can comfortably access the “Tri-plate” near to chest height.
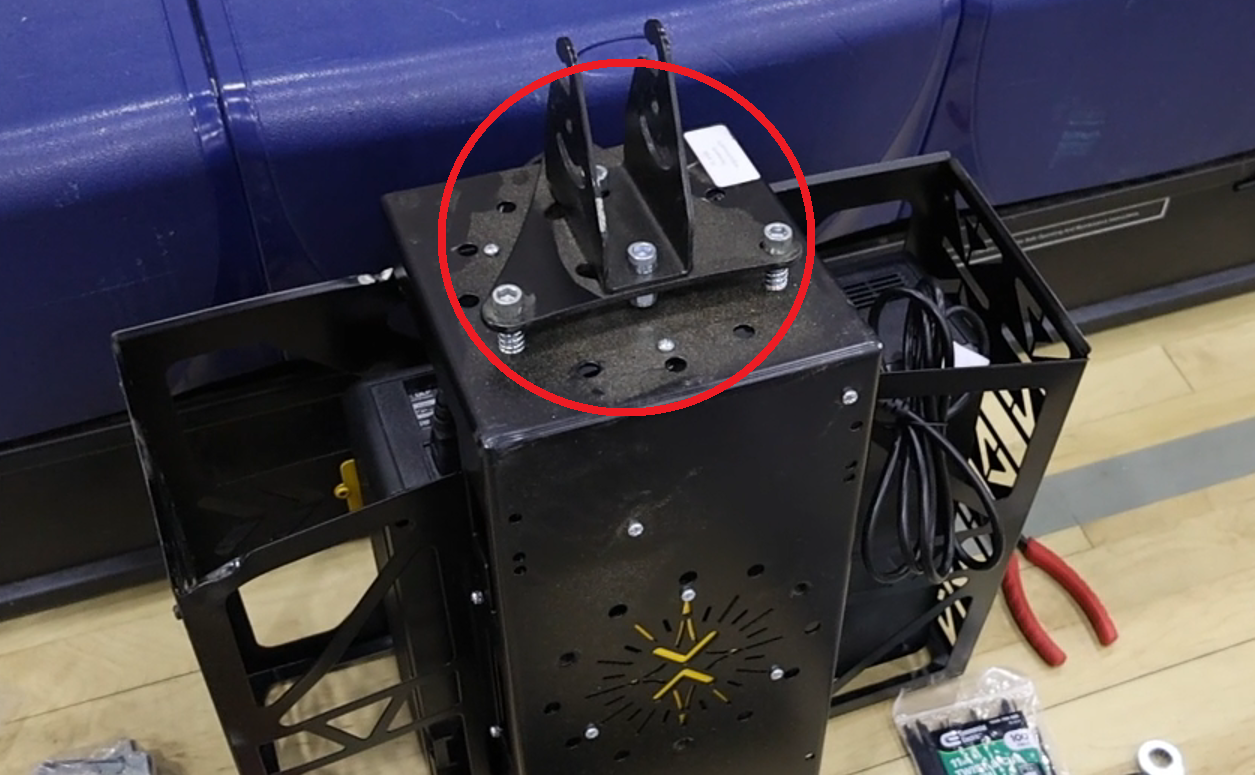 Example Tri-Plate with 3 Adjustable Screws
Step 4: Adjust the Projection
Now that you are in the lift with all of the tools at your disposal, its time to adjust. There are a few different steps to follow, but try them in order:
A) Move the projector a bit until your projector is back in alignment.
Start playing your snapshot show, and look down below. Find some defining feature that you can use as a way to gauge alignment. In general, using the center court logo or the 3-point line are reliable visual indicators. Once you’re playing, you can begin adjustment. Sometimes, the biggest problems have simple solutions. In cases of minor to medium misalignment, you can simply force the projector back into its original placement by pushing the system around a bit. It has a bit of give in each direction, so try to adjust this way before trying any other steps.
B) Adjust the Tri-Plate until as close to flat or 0.0 degrees as possible.
In most cases, when Luxedo’s installation team set up your stem, they will leave your projectors at 0.0 degrees or very close to it. As a result, the easiest way to get close to your original configuration is to try and get the tri-plate back to where it was before. Placing your level on top of the tri-plate (using a digital level if possible), try to physically adjust until you sit between 0.0 and 9,3 degrees, then verify the same on all of the other sides of the tri-plate too. If you are not using a digital level, you are simply aiming to have it as close to as flat as possible. If need be, take your allen wrench and adjust the screws of the tri-plate. It is generally advisable to try and balance the system by tightening instead of loosening the system, as the bolts can fall out if loosened too much, but this is only a problem if loosened to an extreme degree. If the snapshot show is not perfectly aligned when each side of the tri-plate is even, start to slowly adjust them. Tightening a bolt in the tri-plate will pull the projection in that direction.
e.g. tightening the narrow end of the tri-plate will pull the entire projection up, whereas tightening the other two will pull them down and to the side.
C) Play a group show to verify that the system is entirely aligned
D) If you are unable to adjust the projection, call support.
You can contact the support line at 865-505-7670. They will be able to remotely access the projector’s on-board camera and provide further guidance on the re-alignment to get your system up and running.
We also offer Live Support/Technicians to be sent out
If you would like to have live phone support while readjusting your system, please schedule a time with [email protected] to schedule a live support appointment.
If you are interested in having a technician go out to fix the system themselves you can contact [email protected] to organize an appointment, but please note that the following costs apply:
| On-site lead technician (Level II/III) | $135 per hour | 1 hour minimum; 30 minute increments thereafter. Covers projector dismount/remount, alignment, firmware, and warranty diagnostics. |
| On-site assistant tech (rigger) | $45 per hour | Billed only when a second person is required (e.g., lift operation). |
| Travel & mobilization – Zone 1 (0–50 road mi. from Knoxville HQ) | $95 flat | Covers mileage, drive time, tolls |
| Travel – Zone 2 (51–150 mi.) | $95 + $0.70 per mi. over 50 | Mileage keyed to IRS 2025 standard rate. |
| Travel – Zone 3 (>150 mi. or air travel) | Quoted case-by-case | Includes airfare, rental car, lodging |
| Per diem (overnight trips) | $60 per tech / day | Meals & incidentals. Lodging billed at actual cost. |
| Equipment / lift rental | Cost + 15 % | Client may supply its own certified lift to avoid this charge. |
| Emergency dispatch (<48 h notice) | 2 × standard labor rates | Subject to crew availability. |
| Cancellation (inside 24 h) | 50 % of first booked day | Waived if rescheduled within 10 business days. |